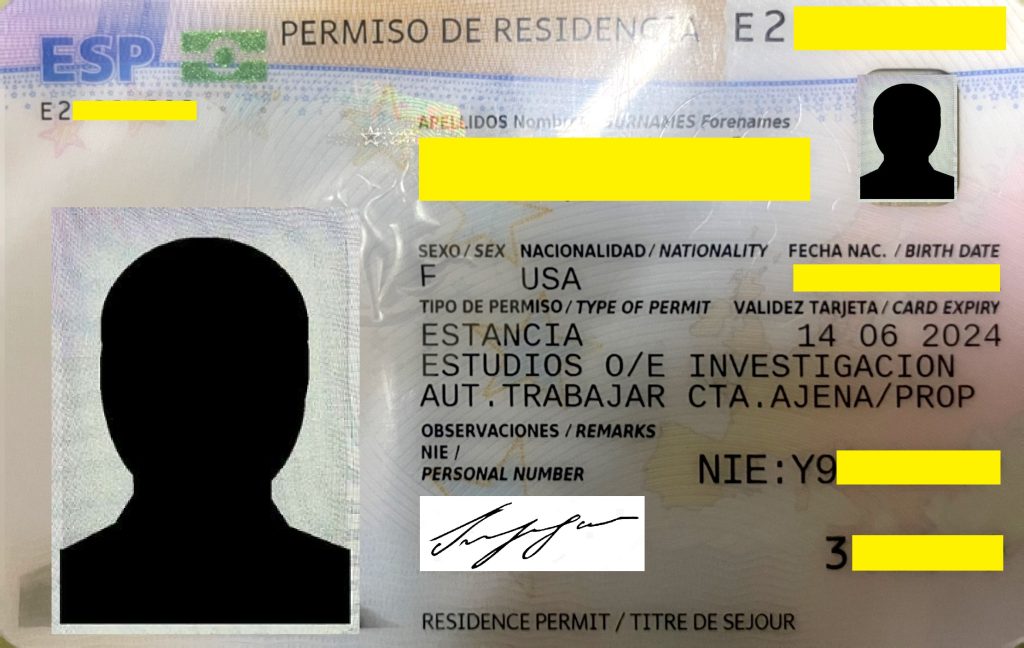
TIE = Foreigner Identity Card
Your TIE appointment must be scheduled within the first 30 days of your arrival to Spain in your primary city of residence. Your appointment date does not have to fall within 30 days of your arrival, but you must have at least scheduled the appointment within your first 30 days in Spain.
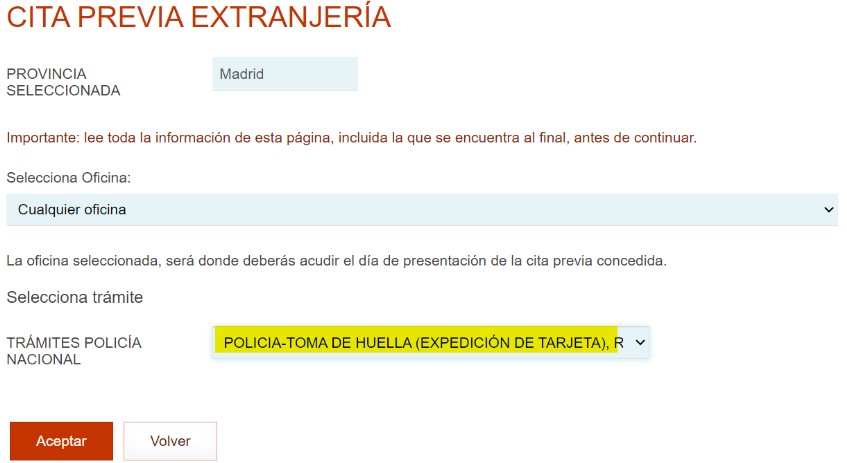
STEP 1: Schedule the Appointment – “Toma de huellas”
In almost every city/town, you must schedule a cita previa (appointment) through this website:
https://icp.administracionelectronica.gob.es/icpco/index
Please note: You must have a Spanish cell phone number in order to receive the SMS code necessary to schedule an appointment, so you will not be able to do so from the U.S.
-
- On the next page, you will see a list of required documents. You will not need them until your appointment date and you may not need all of those listed (see Fulbright Program-specific list below). Scroll down and click the second box: Presentación sin Cl@ve to continue booking your appointment.
PRO TIP: If you are having difficulty scheduling your toma de huellas appointment once in Spain, you should go back and check the appointments every day, multiple times a day. Be sure to take screenshots to prove you have been trying to schedule your appointment. In most provinces, new appointments are released on weekday mornings between 8:00-8:30.
Note for Researchers: It is compulsory that you live for at least the first three months of your grant in the Spanish city that you indicate on your visa application as your city of residence. Otherwise, it will not be possible to process your TIE. If you have any questions about this please reach out to your main contact at the Commission.
STEP 2: The Appointment
1. Forward the Toma de huellas appointment confirmation email to your Main Contact at the Commission.
2. Ensure you have all the required documentation and photocopies ready, by checking the “REQUIRED DOCUMENTATION” accordion below.
3. Consult the TIE Process by Region spreadsheet linked below the accordion to ensure you follow any additional instructions specific to your province.
4. You will receive a comprobante or receipt saying your card will be ready to pick up in 30-60 days. Depending on your region or province, you may have to make an appointment (using the same immigration website, see: STEP 1) to go pick up the TIE: 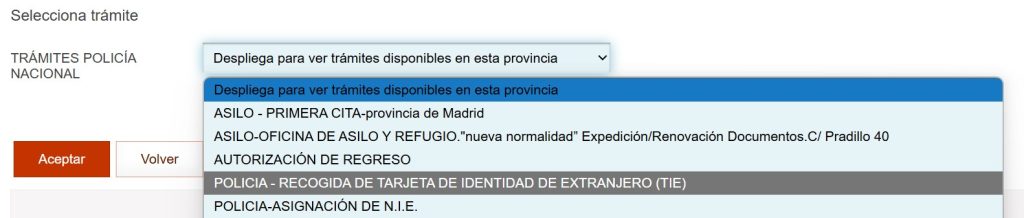
***Do not forget to bring your comprobante (receipt) and passport as identification to pick up the TIE!!!
Original passport and photocopies of:
- The biographical data page including signature
- The visa page, and
- The page bearing the stamp with your date of entry:
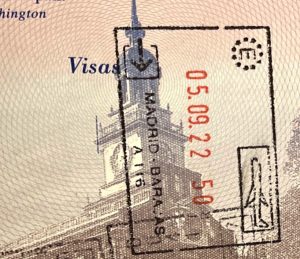
If you entered through another Schengen country and so your stamp is from, for example, Germany, you must keep the boarding pass with you that demonstrates the date you entered Spain.
If you took ground transportation into Spain – such as a train from France – you should keep the ticket stub demonstrating your date of entry to Spain and bring the original and a photocopy of that to your toma de huellas appointment. The original boarding pass is best, but if you only have access to a digital version, print that out to bring to the appointment.
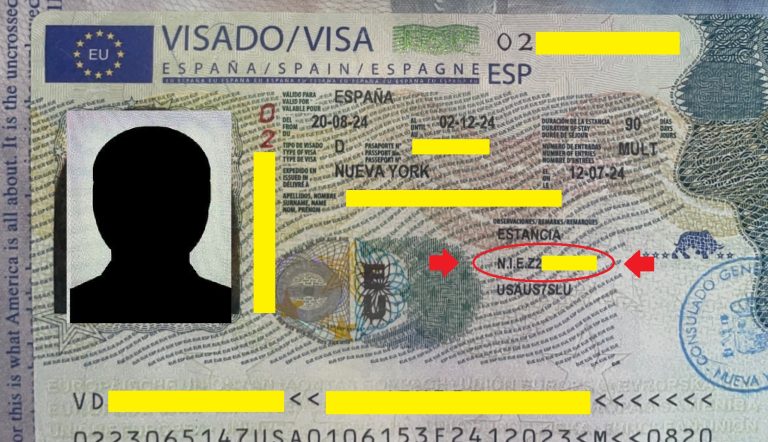
You will find that your individual TIE Certificate, issued in Spanish (very similar to the Visa Certificate), from the Commission was emailed to you upon arrival. This certificate can be found as an attachment to the email:
“Welcome to Spain! / REQUIRED DOCUMENTATION

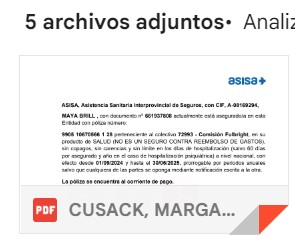
Grantees should print out a copy of the ASISA Certificate sent to you by email from your Main Contact at the Commission prior to your travel to Spain:

The ASISA Certificate contains your insurance policy number and is proof of health coverage for the duration of the Grant:
↓
Three identical carnet-size photographs on white background (Spanish standard size; your U.S. passport photos will not be accepted).
The photographs taken at any photo booth (usually found at or near major bus, train, or metro stations) are an economical way to get these:
In Spain, “empadronamiento” is the process of registering your address with the local city hall. This registration is important because it allows you to access public services like immigration processes, and can be used to qualify for local discounts.
Once you’re registered, you get a certificate called a “certificado de empadronamiento” that proves where you live. It’s a basic administrative requirement for both citizens and foreigners residing in Spain.
For instructions on how to obtain this certificate, visit the empadronamiento page of the Online Guide.
Though this document is not always required for the toma de huellas appointment in all cities, it is strongly recommended that you bring it with you.
If you know that in your city/province it is usually required, but you know you will not have it for your toma de huellas appointment, schedule an empadronamiento appointment and bring a print-out of the appointment confirmation with you to your toma de huellas appointment to show if you are asked for the empadronamiento. In some cases extranjería officials will accept this in lieu of the actual certificado de empadronamiento.
Fill out and sign the (EX-17) TIE request form, bringing two copies with you. You can take a look at an example form here. If you complete the form on your computer, you can save the completed form by selecting print and then, instead of printing, saving it as a PDF. You can then print out your saved version later for your TIE appointment. Below are some reminders for when filling out the form:
- If you fill it out by hand, make sure to use black ink and write clearly in CAPITALS
- Read the instrucciones de cumplimentación on the second page of the form. Each number serves as a footnote for part of the application and explains how to fill out these different sections
- Remember that, for most of you, the N.I.E number/letter identification is on your visa under the estancia section
- Write your surname in 1er Apellido and leave 2º Apellido blank (as applicable). Write your full first name under Nombre, including your middle name(s). You should write your name as it appears on your passport.
- Remember that for the date of birth (Fecha de nacimiento), in Spain the date of birth is filled out with the day first: dd/mm/yyyy
- Under Estado Civil the letters stand for:
S: Single V: Widowed Sp: Separated C: Married D: Divorced
- Domicilio: Nº refers to the building number, and Piso includes the unit number (including izquierda, bajo, etc.)
- You can leave the entire row with Representante legal, en su caso blank
- You can leave Section 2 (Datos del presentador de la solicitud) completely blank
- Section 3 (Domicilio a Afectos de Notificaciones) is your mailing address in Spain. For most of you, this will be the same apartment address you entered above. In this section, PAS refers to your passport number
- In section 4.1, check the Tarjeta inicial box
- Don’t forget to sign it! And then, of course, make a photocopy (or two) so that you have proof of what you submitted to extranjería in case there is an error on your TIE.
You must bring the justificante (receipt) of your paid tasa or tax fee (Form 790, Code 012) for 16,08€. After you pay this at a bank, the teller will return two receipts to you, one for you and one to turn in to extranjería. See instructions below and if you are confused, look at our EXAMPLE TASA FORM to see what it should look like once you generate the copies to print:
- Go to https://sede.policia.gob.es/Tasa790_012/ You might get a warning message that the site is not secure – disregard it and continue by clicking “Advanced” and then “Continue anyway” (or similar text depending on your browser). It might also take more than one try to get the link to work – just insist. Each person needs to complete one form, as they bear an individual code; i.e., the form cannot be shared
- Select “Rellenar formulario y descargar”.
- Fill out the tasa form, making sure to include your NIE number (again, for most of you found on your visa).
- Below the personal data section, go to section “Tarjetas de identidad de extranjeros (TIE) y certificados de registro de residentes comunitarios” and choose “TIE que documenta la primera concesión de la autorización de residencia temporal, de estancia o para trabajadores transfronterizos.”
- Choose “En efectivo” as “Forma de Pago.”
- The fee box will be completed automatically with the correct amount.
- Print the form by selecting “Descargar impreso rellenado.” You will get three copies of the form: the first one for the Oficina de Extranjería or “Administración”; the second for yourself or “el interesado”; and the third for the bank or “entidad colaboradora.” Then, sign the form under the date on all three pages. You can disregard the instructions on the fourth page.
- Go to any bank with the three copies to pay the tasa fee in cash. They will give you back two stamped copies of the form which you must keep, one of which you will turn in to extranjería.
NOTE: Increasingly it is possible to pay tasa forms at ATMs without needing to go to a teller. The receipt that is generated by the ATM when you pay the tasa form is also acceptable for your TIE appointment.
For TAs ONLY: You must also bring the carta de nombramiento/certificación or Placement Letter you received from the Consejería de Educación of your regional government or from your program.